Categories
Your categories are types or groups of your products. They serve as an organization method that keeps your similar products grouped together.
You can create custom categories based on the needs of your business and delete them as needed.
In order to access your categories tab, look under "Inventory" on the leftmost menu of the website.

Once you've reached the "Categories" page, you can create a category with the purple "Create Category" button near the top-right corner of your screen.

After clicking that button, you'll be lead to the "Create Category" section in which you'll be entering a name and description for the category you wish to make.
Next, you can click on the purple "Create Category" button in the bottom-right corner to make your category. The "Cancel" button can be used to stop category creation.

Clicking "Create Category" will lead you back to the page where all of your categories are displayed.
If you wish to make further changes to a category after its creation, click on the "three dots" icon in the top right of your category.

The "Edit Details" button pictured above will allow you to change both the name and description of your category. The category can be updated or canceled through the same method as category creation.

The "Mark Inactive" button serves as a "soft delete" for your category. When you click on this button, a confirmation menu will appear. Click "Mark Inactive" again to confirm, or cancel to go back.

If the category has been successfully marked as inactive, a green notification stating "Category Updated Successfully" will appear in the upper right corner of the screen. Products can be marked as active again using the same process that was used to mark them as inactive.

To sort your categories by the number of products or when it was last updated, click on the "Filters" button.

Under the "Products" filter you will see a sliding number scale in which you can sort your categories by the number of products in them. To change this product range, click and drag one of the circles to specify your desired product range.

As you can see, the circle that is pointed at by the red arrow above is the lowest product range you would like to see, while the circle below the blue arrow is the highest number of products you want to see in your category.
Click on the purple "Show Results" button to apply your specified criteria and then all qualifying categories will be displayed. You can tell that a category has been applied when there is a green dot next to the "Filters" icon.

The "Updated At" filter asks you to apply a Start Date and End Date that you wish to filter by (mm/dd/yyyy). When you click on them, a calendar will appear in which you can select the desired date.

Once you've entered in a start date and/or end date, click on the purple "Show Results" button on the bottom right corner to see the results.

After you click on a category, it is further divided into sub categories. These can be edited, marked as inactive and filtered in the exact same way as the normal categories. You can sort your sub categories by what category they're under using the buttons located under the "Sub Categories" title.

Clicking on a sub category like the one that's being pointed at here:

Will lead you to a page that lists all of the products in that sub category, as seen below.

- The blue arrow points to the menu where you can change the category.
- The red arrow is where you change the sub category.
- Click on the dropdown menu that the orange arrow is pointing to in order to alter the row amount.
- Click the purple "Add Product" button next to the black arrow to add products to the sub category.
- The green arrow points to the "Edit Details" menu where you can change the details of a product. This is accessed by clicking the "three dot" menu on the right side of any of your products.
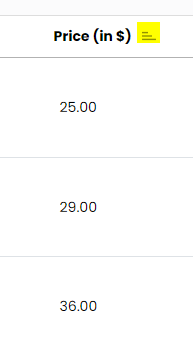
Individual columns can be filtered by clicking this button highlighted in yellow below: